Basics
Editor
This section describes commonly used terms and basic components of the TTModeler tool.
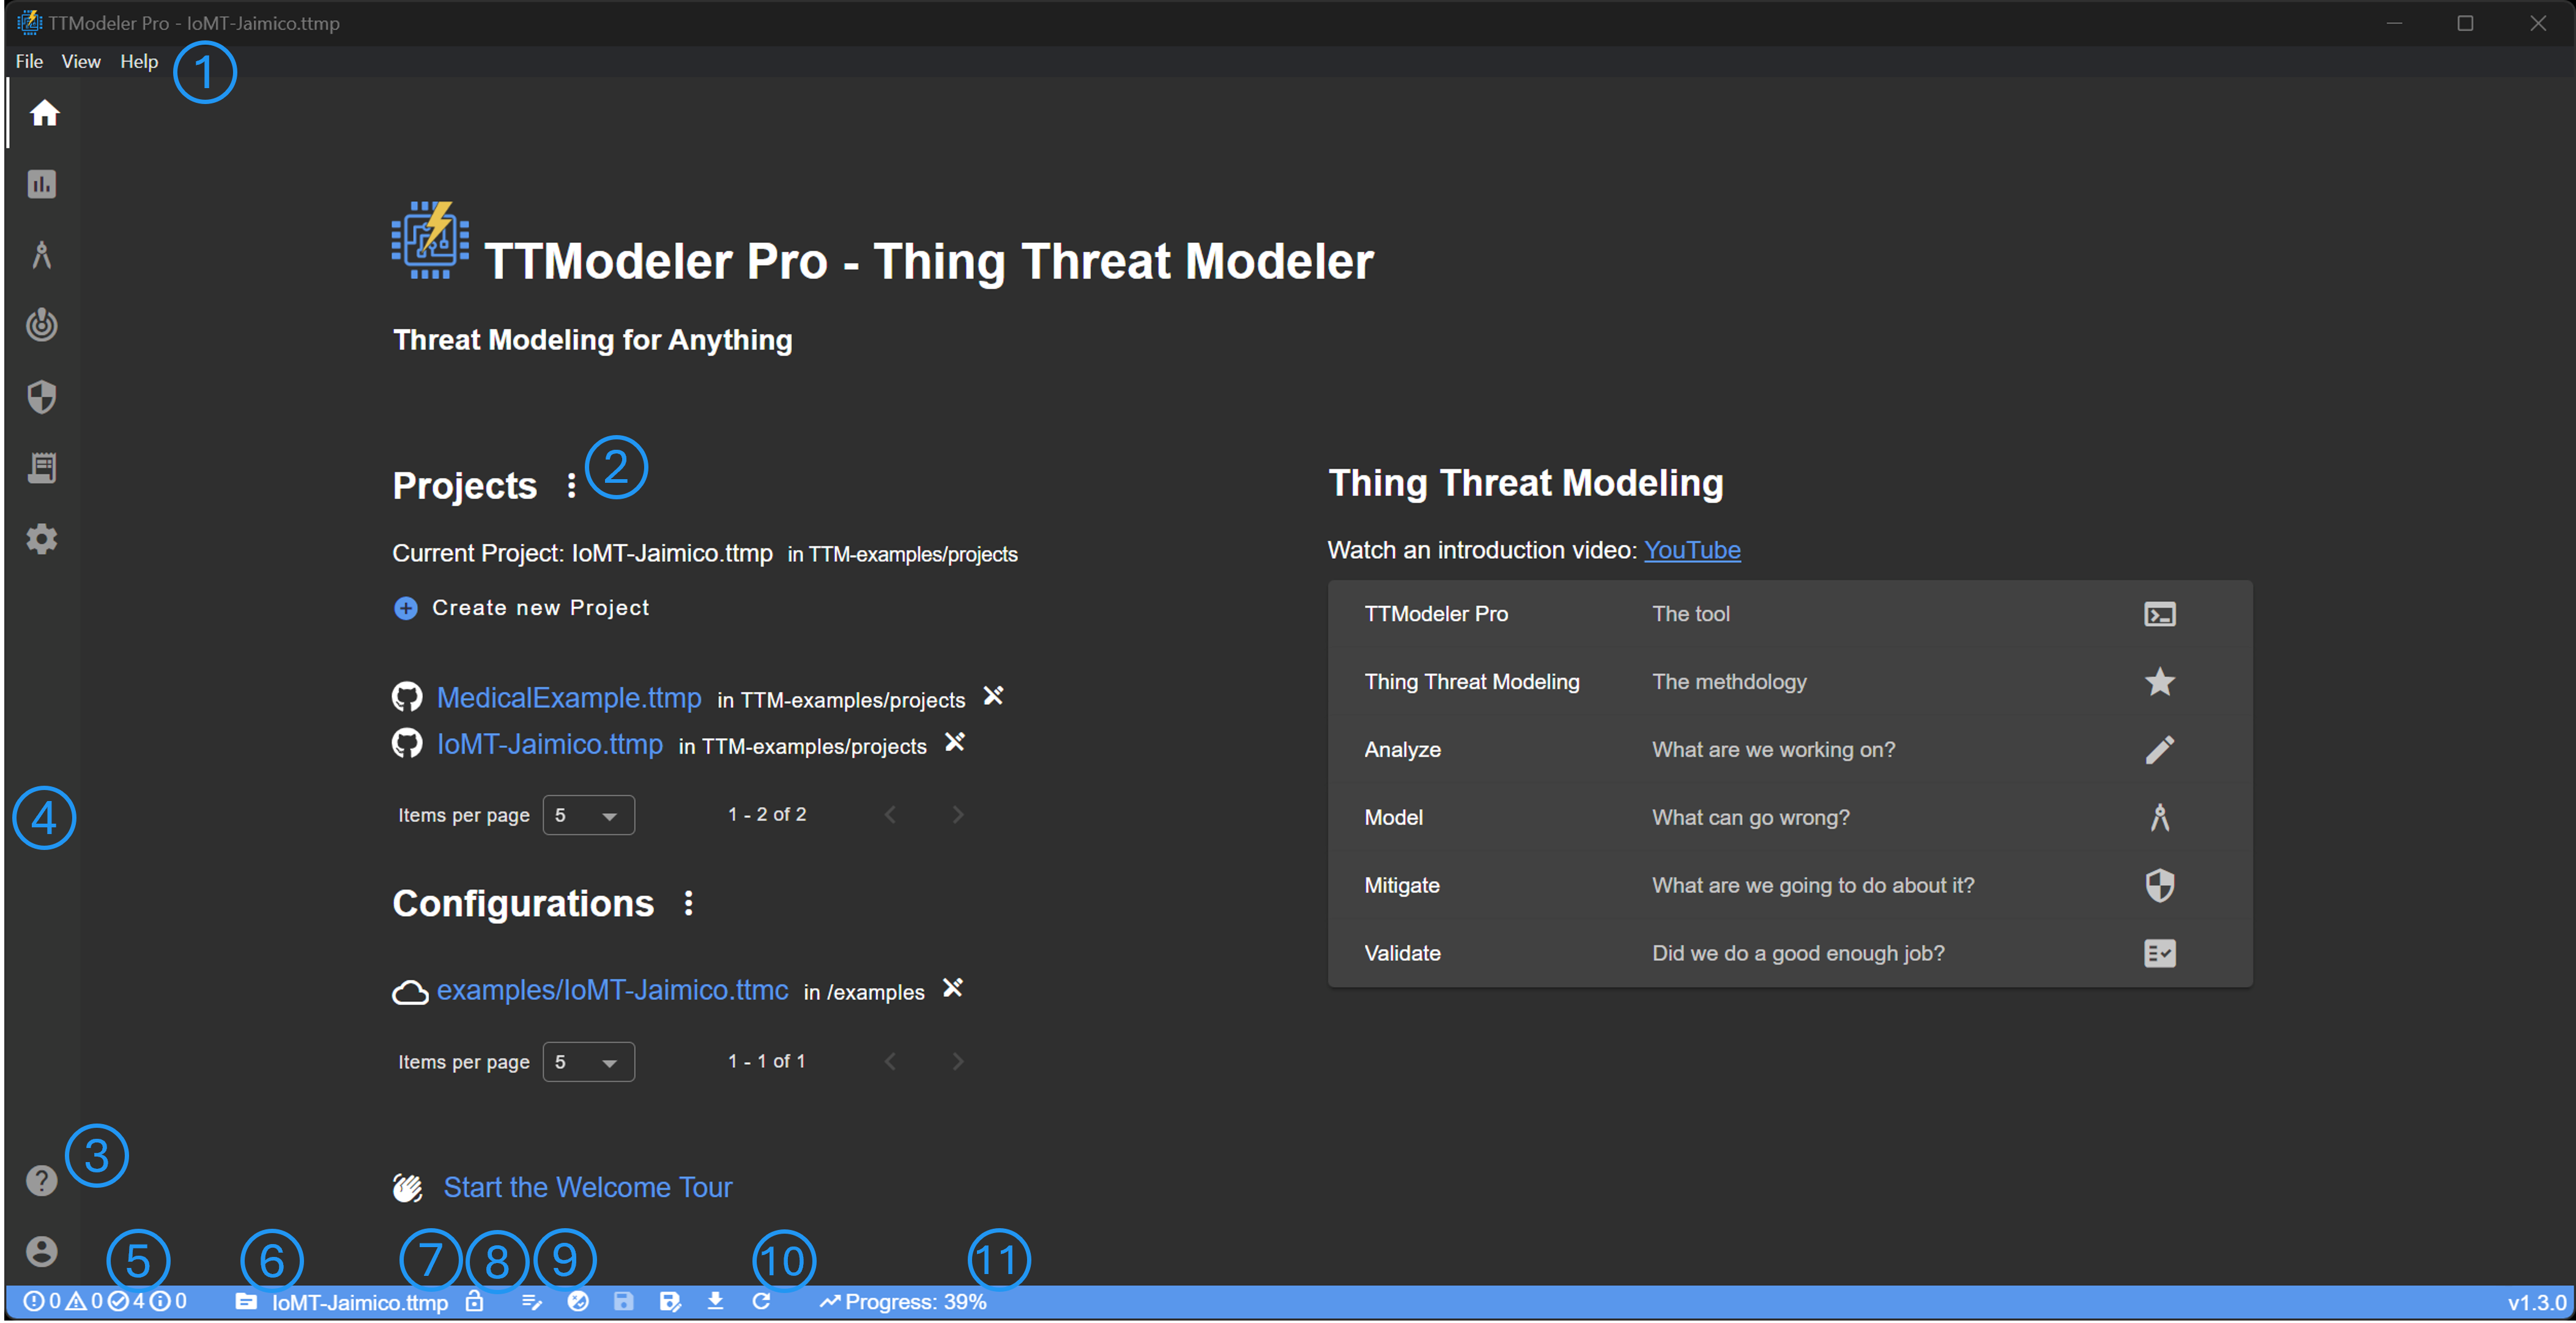
The desktop application has a menu at the top (No. 1), which is not available in the web version. However, File has basically the same options as the three-dots-menu next to Projects (No. 2). The Help menu equals to No. 3. The Side Bar (No. 4) is used for navigation and always visible. The top icons lead to the pages Home, Dashboard, Modeling, Risk, Mitigation, and Configuration. The user icon at the bottom, Account, is used for settings such as login, cookies, license, theme, language, and message notifications. The blue Status Bar at the bottom shows common information and can be used for quick actions. There is a log of system messages (No. 5), a quick link to project information (folder icon, No. 6), and the current open file (No. 7), which also to a file changes dialog. For projects, it is possible to encrypt the project with a password (No. 8). Icon No. 9 opens a notes dialog, allowing to take project-wide notes. It follows a series of buttons for Consistency Check, Save, Save as, Download, and Reload (No. 10). Icon No. 11 shows and opens the Progress Tracker.
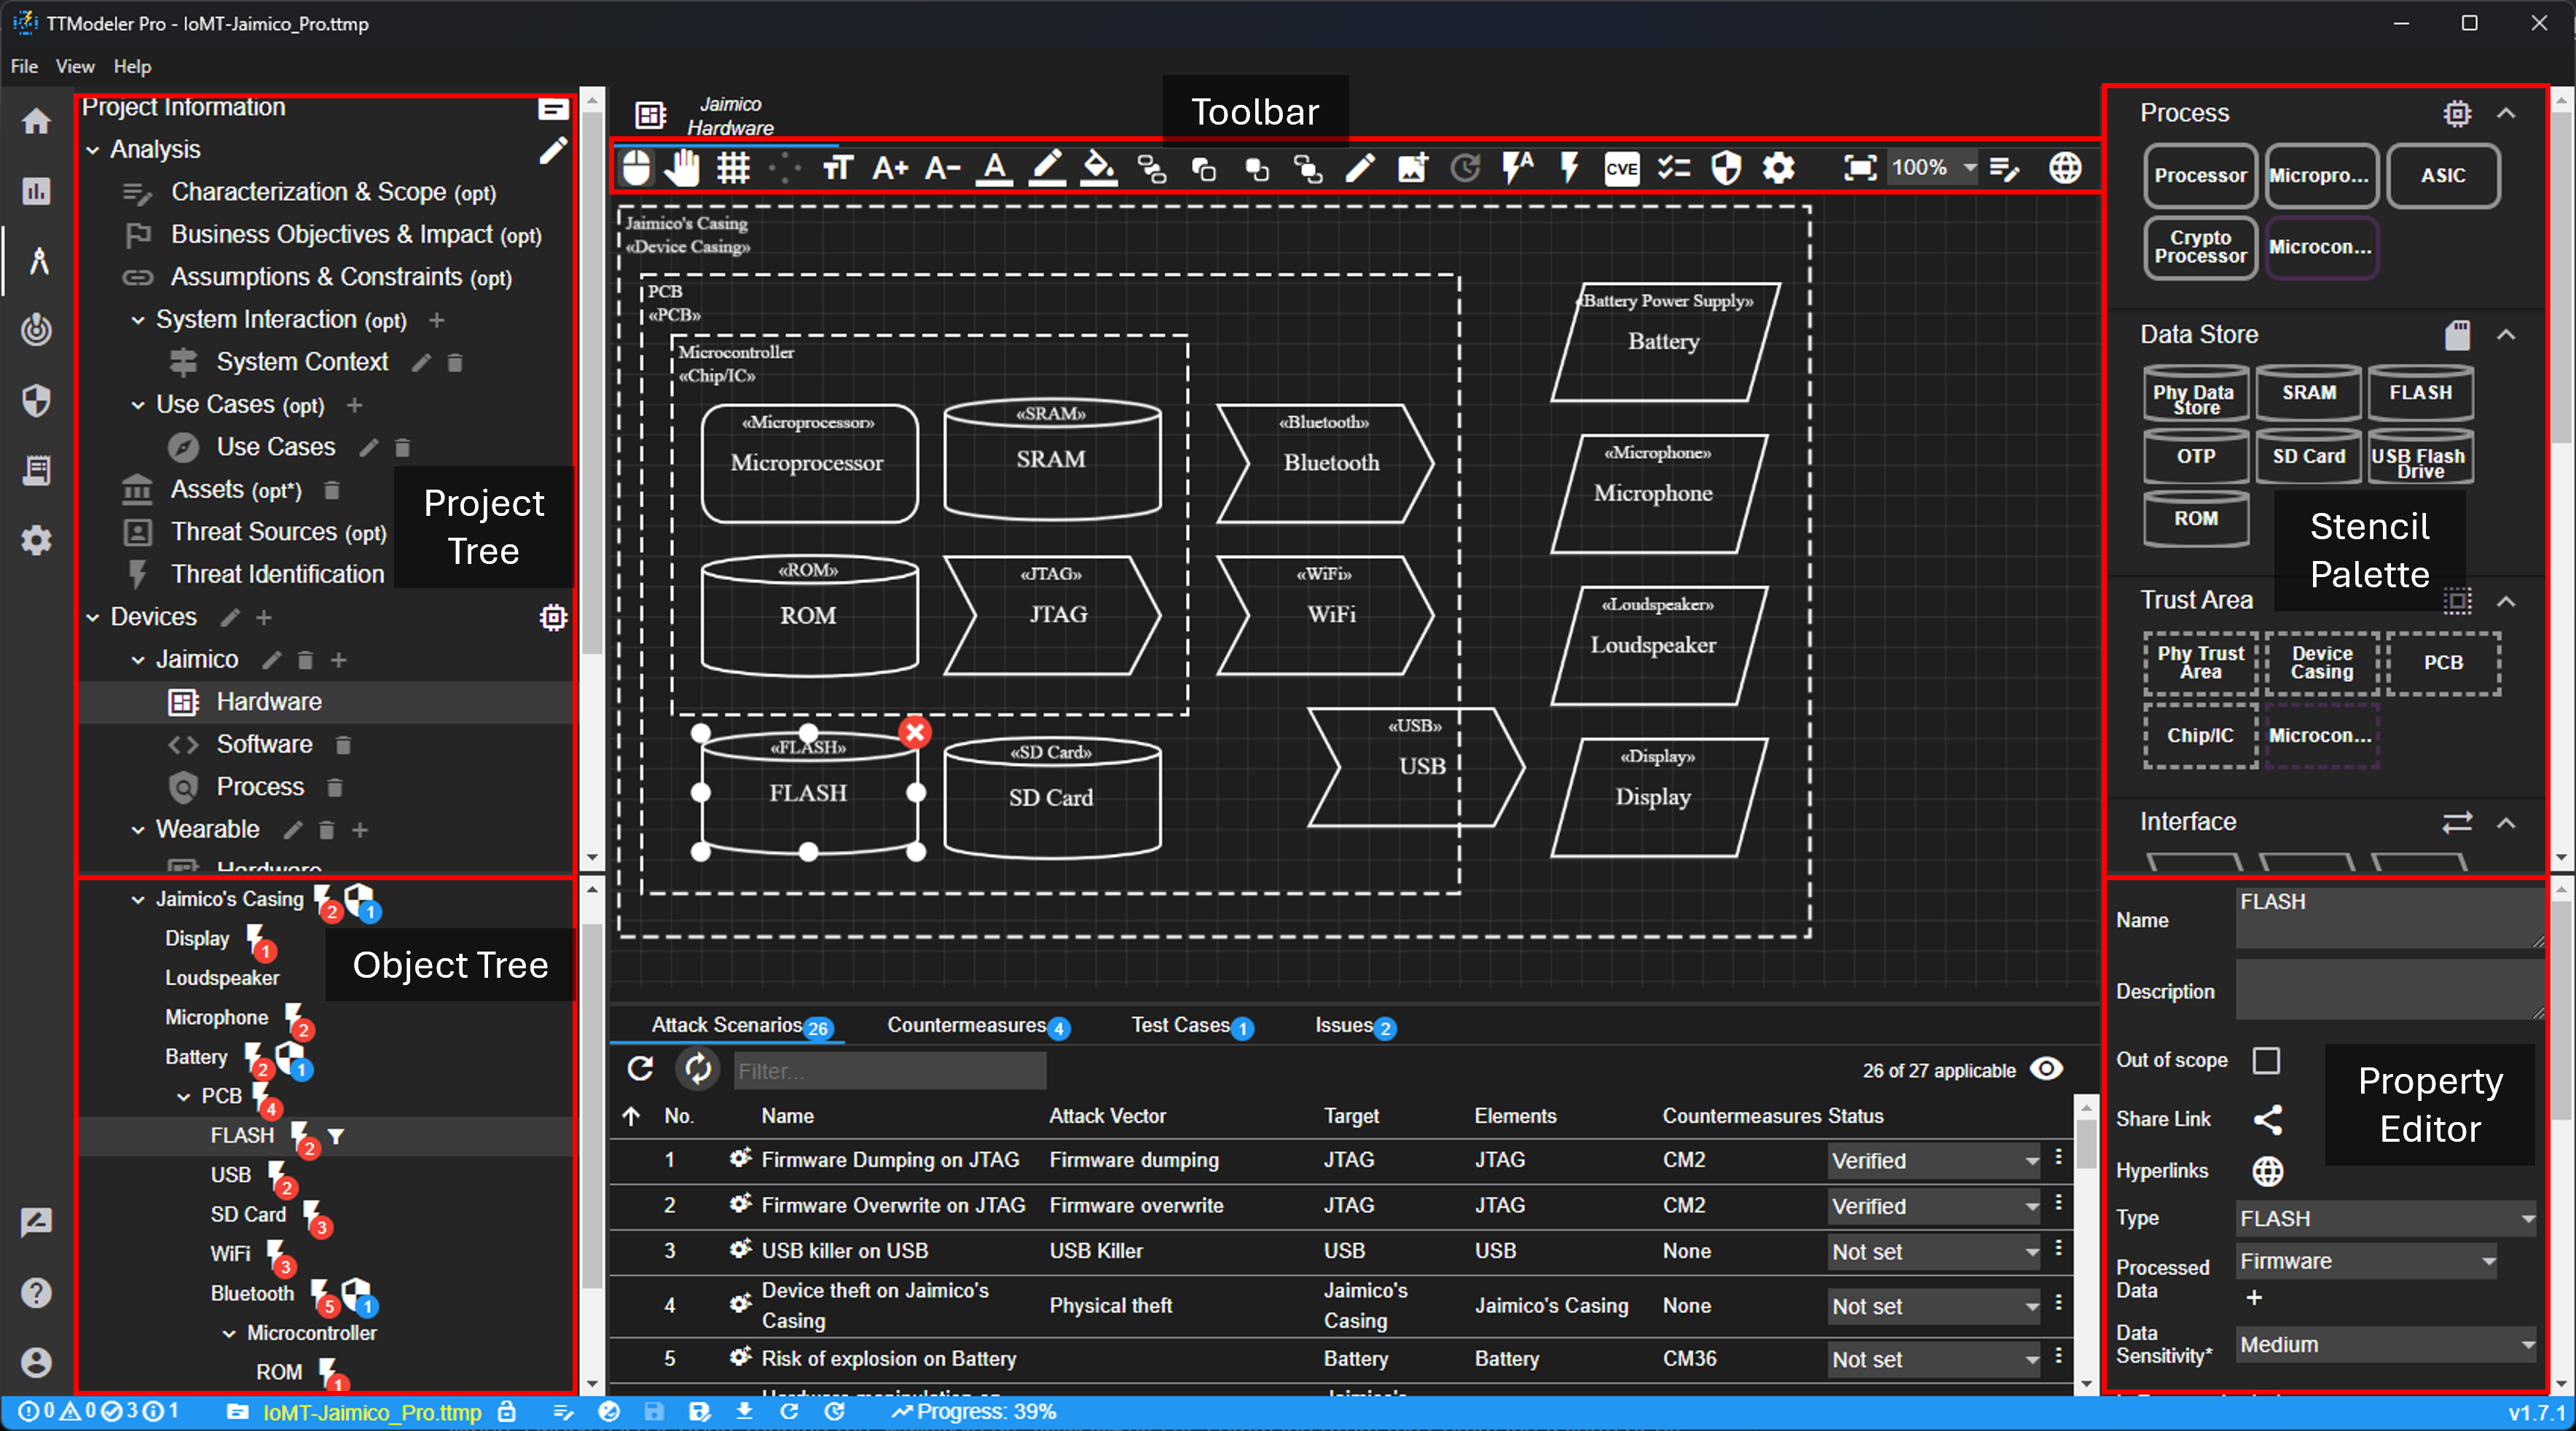
The structure of the modelling page is described in more detail in the Canvas.
Editor Settings
There are a few editor settings that can be changed via File > Settings or Account > Settings. The following settings are available:
- Language: English or German.
- Date format: English or German.
- Spell check: Spell check is activated or deactivated in text fields.
- Check for updates: Tool checks on program start whether there is a new version available.
- Message notification for different message types.
- Snapshots: Possibility to temporarily store snapshots of the project file, which get deleted on file saving, unless the snapshot is pinned.
Creating a Project
A new project can be created on the Home page. If several configurations are available, one must be selected first.
In the shown project wizard, some important settings can be configured. First, the used Risk Assessment Method and CVSS version must be selected. The decision is not final, a method change is possible afterwards.
In the second step, users can decide between pre-configured views (Simplified, Recommended, Full). Based on the used view, the settings in the third step are activated or deactivated.
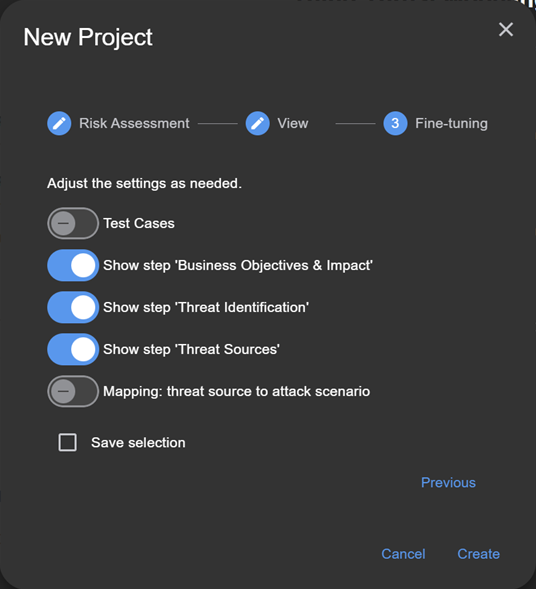
The shown settings in the third steps are an excerpt of the Project Settings that can be changed via Modeling > Project Information.
Tip
Save your selection - the wizard then jumps immediately to step 3.
Project Information
Meta Data
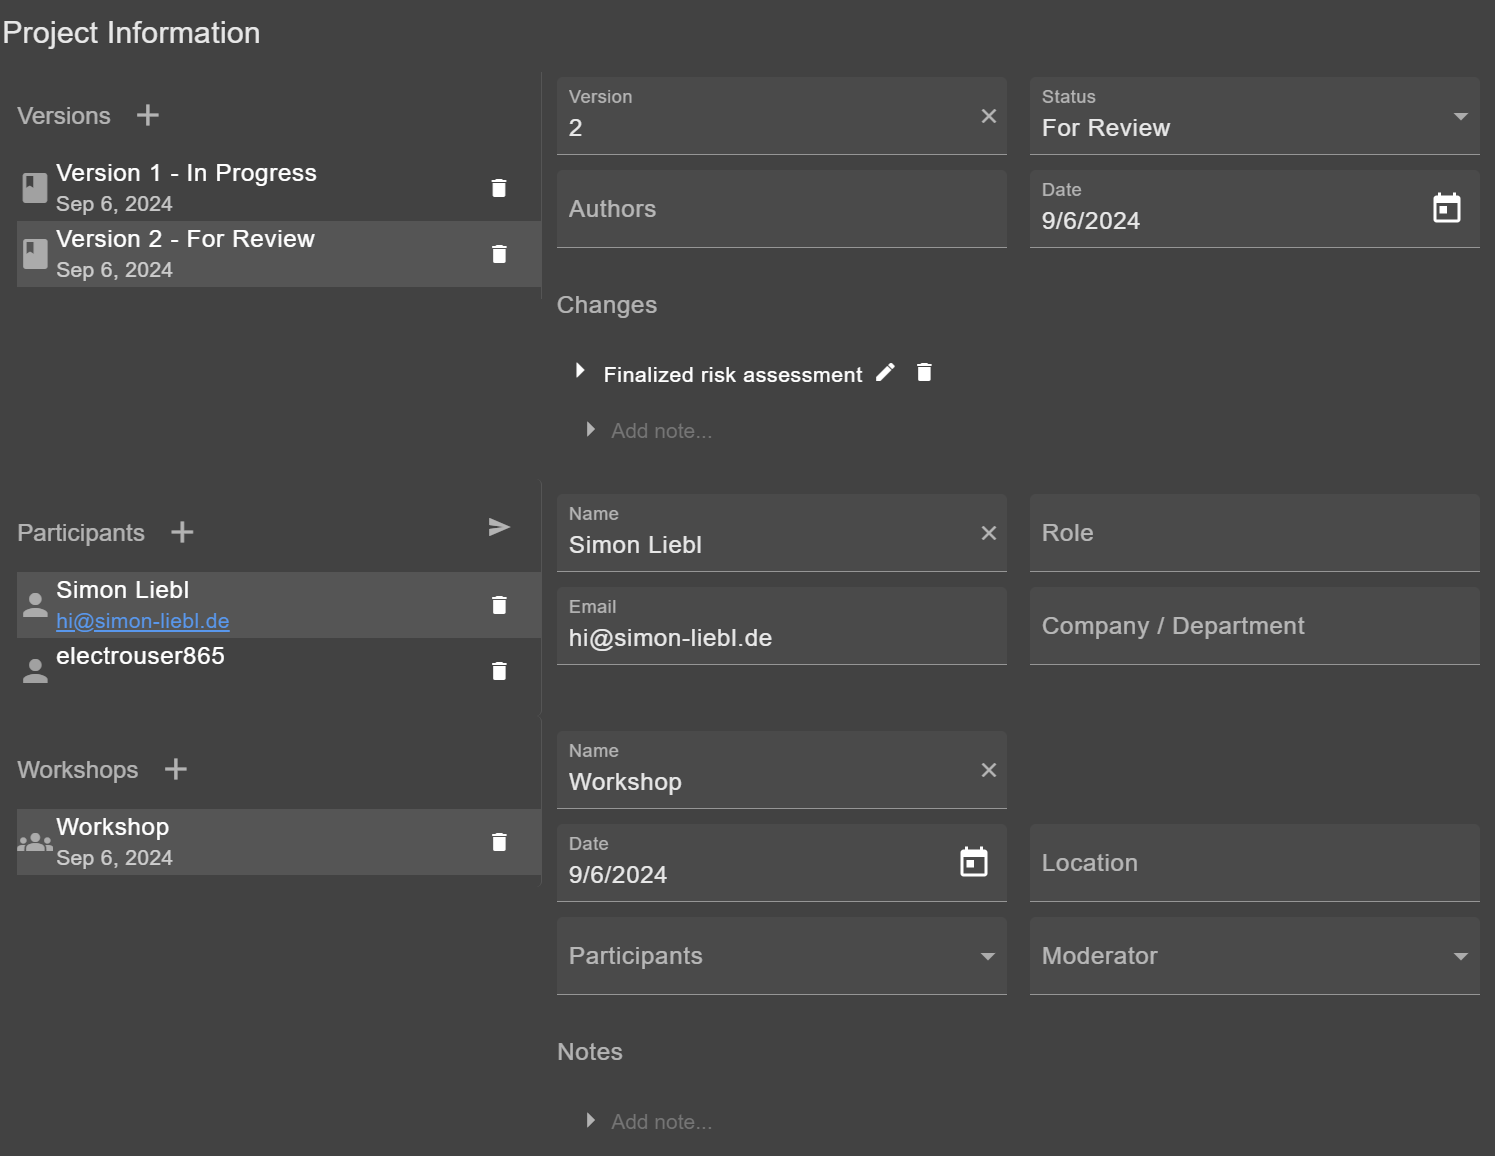
There are a few fields available for meta data, for instance, for project name, description and image. If project name and system under consideration are defined, these values are used in the generated report.
There is also a version history, allowing to track changes in the project on a high level. Furthermore, it is possible to list all people participating in the analysis. An e-mail can be sent to all participants using the icon button above the list. If necessary, a list of workshops can be managed to highlight the progress.
Settings
There are a project-wide settings:
- Test cases: When this option is activated, test cases can be defined via Modeling > Test Cases. This feature may be useful if tests are carried out in parallel on a real system.
- Show step "Business Objectives & Impact": Show or hide this step in project tree.
- Show step "Threat Identification": Show or hide this step in project tree.
- Show step "Threat Sources": Show or hide this step in project tree.
- Mapping threat source to attack scenario: a new field appears in attack scenarios, enabling to define actors for each scenario individually.
- Protection goals: Define the impact of assets and system threats separately for each protection goal.
- Data sensitivity: Hide this property, as it is marked as deprecated. It is recommended to define the impact per protection goal.
- System threat impact: Hide this property, as it is marked as deprecated. It is recommended to define the impact per protection goal.
- File format: Save file in readable JSON format. However, this increases the file size.
- Track last date of change and user: The last modification of an item (e.g. attack scenario) will be tracked in terms of time and user.
- Save file changes: Changes to the project or configuration (limited) can be stored as part of the file. The size of this log can be defined (in bytes).
Working with a Git-based System
File Locking (Checkout)
It is possible to check out files so that they cannot be overwritten by another user. Once a file from a git repository is opened, a popup shows at the top of the window enabling the checkout. Alternatively, a project can be checked out via Modeling > Project Information.
The checkout functionality is realized by the .ttm-git.json file that is stored in the repository. In this file, all checkouts are tracked. It is also possible to change the repository settings to stop asking for the checkout. At the moment, it is only possible to stop asking for the entire repository and not each file separately.
There are two ways to check in a file: First, go to Modeling > Project Information and click the button "Checkin" in the "Git" section. Second, close the file or tool. Then, a dialog will show asking you whether you want to check in the file.
History
The advantage of a Git-based system is that every save is stored as commit. The commit history can be viewed in the "Git" section in Modeling > Project Information. It is possible to load or share a former commit. This is not a Git-operation. To restore a former commit, the commit must be loaded and then saved.
File Baseline
Again in the "Git" section in Modeling > Project Information, it is possible to create a baseline for the latest commit. Baselines can have a name and description and provide further information to a commit. Baselines are also stored in the .ttm-git.json file. This is not a Git-operation.
Saving
There are multiple ways to save a project (see Editor image): via File (No. 1), Projects (No. 2), and Status Bar (No. 10). It is differentiated between Save, Save as, and Download. The resulting action depends on the used platform (web or desktop app) and login type (guest or git-based system), except the Download function, which always opens a download dialog. If Git is configured, saving to Git is preferred. If you still want to save locally, the download action must be executed the first time.
Warning
There is currently no function to undo an action. Errors can also occur in the program that lead to inconsistent states. Therefore, it is strongly advised to regularly save and create backups of files to prevent data loss. It is recommended to use the snapshot functionality (see Editor Settings).
Progress Tracker
The tool was designed around methodology TTM (Thing Threat Modeling). A progress tracker is included for easy step-by-step application of the methodology. A more detailed introduction is provided on YouTube.
Bug Report
The bug report feature provides a comprehensive way to report issues encountered while using TTModeler. This functionality is accessible through the Help menu or the help icon in the side bar.
Report Contents
When creating a bug report, users can provide the following information:
Description
A detailed description field allows users to enter as much information as possible about the encountered issue. This should include what was expected to happen versus what actually occurred, any error messages displayed, and the context in which the bug appeared. The more detailed the description, the easier it is to diagnose and fix the issue.
Screenshots
Users can attach one or multiple screenshots directly to the bug report. Screenshots are particularly valuable for documenting visual issues, unexpected UI behavior, or error dialogs.
Reproduction Steps
A structured section is available for listing the exact steps needed to reproduce the bug. Ideally, a step-by-step list is provided that describes the actions taken before the issue occurred. Clear reproduction steps significantly increase the likelihood of quickly identifying the root cause. For example:
- Open a new project with configuration X
- Navigate to the Modeling page
- Add a component to the diagram
- Click the Save button
- Observe the error message
Log Selection
The bug report automatically includes relevant system logs to aid in diagnostics. Three types of logs are available:
- Tool Messages: Application-level messages, warnings, and errors generated by the TTModeler tool
- Project Logs: Project-specific operations, changes, and events
- Configuration Logs: Configuration-specific operations, changes, and events
For each log type, users can specify the number of recent log entries to include in the report, starting from the most recent entry. Use the numeric input field next to each log type to select the desired quantity.
The log viewer displays all available logs for each category. Selected logs that will be included in the bug report are shown in normal text, while logs that exceed the selected quantity are displayed in a grayed-out state to indicate they will not be part of the report.
Submission Options
Once all information has been entered, the bug report can be submitted using one of two methods:
Direct Submission
Click the Send report button to submit the bug report directly through the tool. The report, including the description, screenshots, and selected log entries, is transmitted securely to the TTModeler support system. A confirmation message will appear once the report has been successfully submitted.
Email Submission
Alternatively, click the Send as Email button to generate an email with all bug report details pre-populated. This option opens the default email client with the report attached. Users can review and add additional information before sending the email.