Getting Started
Installation & Usage
The tool TTModeler Pro is distributed both as web and desktop application. There are almost no differences between both options. There are a few benefits for each:
➕ Desktop Application
- Easier file handling of local files, as the tool has access to the filesystem
- Associated file extension, if setup is used
- Possibly performance improvements
➕ Web Application
- No download/installation required
Tip
You don't have to choose one of the two variants - you can use both options at the same time.
Desktop Application
The desktop application can be downloaded here or via Debian package repository (see below).
The app is available for the following platforms and variants:
- Windows standalone executable (.exe)
- Windows setup for installation under local AppData
- Linux standalone executable (.AppImage)
- Linux Debian package (.deb)
Tip
Both Windows setup and Linux Debian package support automatic updates.
A free hard disk space of 500 MB is sufficient for the installation. At least 2 GB of RAM should be available when running the software.
Debian Package Repository
There is a custom Debian-compatible APT repository to receive automatic updates.
The custom repository can be added via the following commands:
curl -sS https://emgarde.de/releases/debian/public.key | sudo gpg --dearmor --yes -o /etc/apt/trusted.gpg.d/ttmodeler.gpg
echo "deb https://emgarde.de/releases/repo stable non-free" | sudo tee /etc/apt/sources.list.d/ttmodeler.list
The package can be installed via apt install ttmodeler-pro and updated via apt update and apt upgrade.
File Association
It is possible to associate TTModeler projects (.ttmp) and configurations (.ttmc) with the tool. For Windows, the provided setup can be used setting everything up.
For Linux, edit the file /user/share/applications/ttmodeler-pro.desktop and add the following line at the end:
MimeType=application/x-ttmp;application/x-ttmc;x-scheme-handler/ttmodeler;
Furthermore, create the file ttmodeler-pro-mime.xml in /usr/share/mime/packages/ with the following content:
<?xml version="1.0" encoding="UTF-8"?>
<mime-info xmlns="http://www.freedesktop.org/standards/shared-mime-info">
    <mime-type type="application/x-ttmp">
        <comment>TTModeler Project</comment>
        <glob pattern="*.ttmp"/>
    </mime-type>
    <mime-type type="application/x-ttmc">
        <comment>TTModeler Configuration</comment>
        <glob pattern="*.ttmc"/>
    </mime-type>
</mime-info>
Afterwards, update the databases:
sudo update-mime-database
sudo update-desktop-database
Web Application
The web application is here available.
Licensing
Adding a License Key
The tool opens automatically a dialog and ask you for a license key as soon as you perform an action that requires a valid license. If there is already a valid license key, new ones can still be added (see Managing License Keys).
Managing License Keys
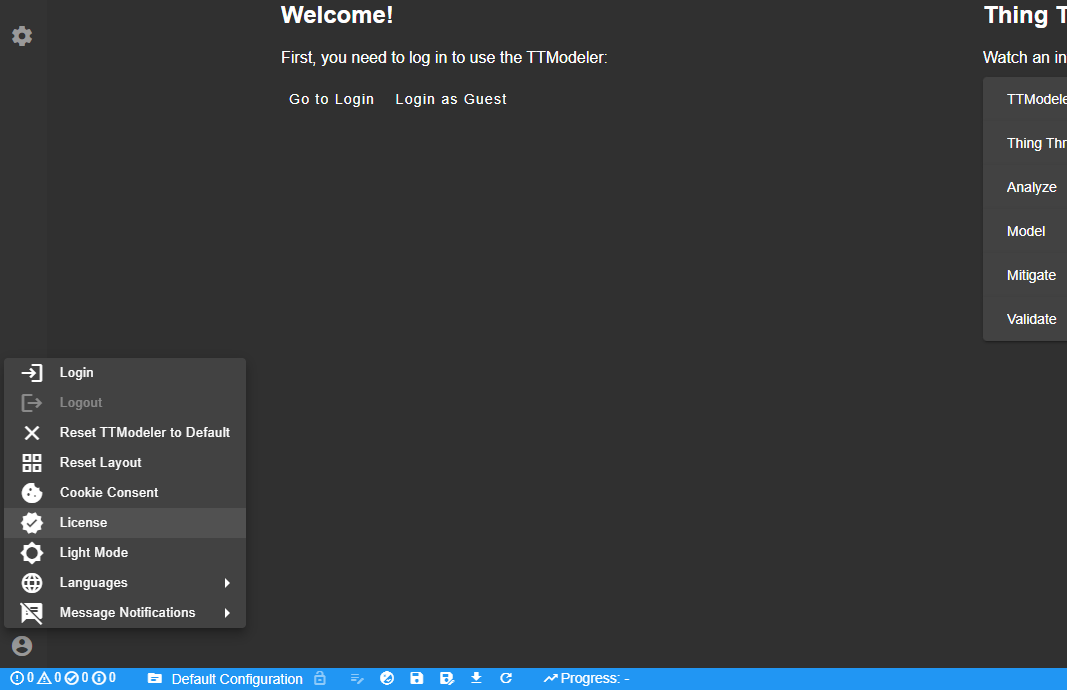
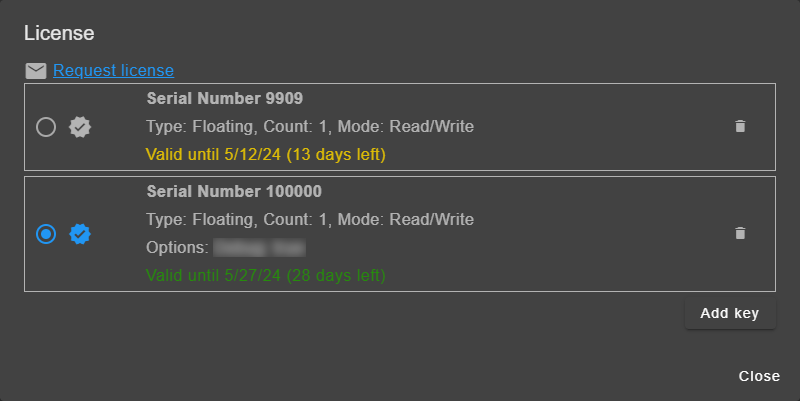
Licenses can be managed via the "License" dialog, accessible via the account menu.

Additional licenses can be added or removed in the dialog. The currently used license is selected via the radio button.

Using a Git-based System
Using Git has following main advantages:
- Collaboration: Multiple users can easily work on the same project
- Versioning: Possibility to track changes and return to a previous version
- Issue tracking: Link objects (e.g. countermeasures, attack scenarios, ...) to issues and keep them synchronized (currently only Azure DevOps Work Items supported)
Setting up a Git-based system can be done via Account > Login.
Currently, GitLab, GitHub, and Azure DevOps are supported. Instructions on how to log in can be found on the login page. For GitHub, a video is available on YouTube.
For further information, see Working with a Git-based System.
Further Help
Video Tutorials
A series of short video tutorials is available on YouTube explaining the first steps.
Glossary
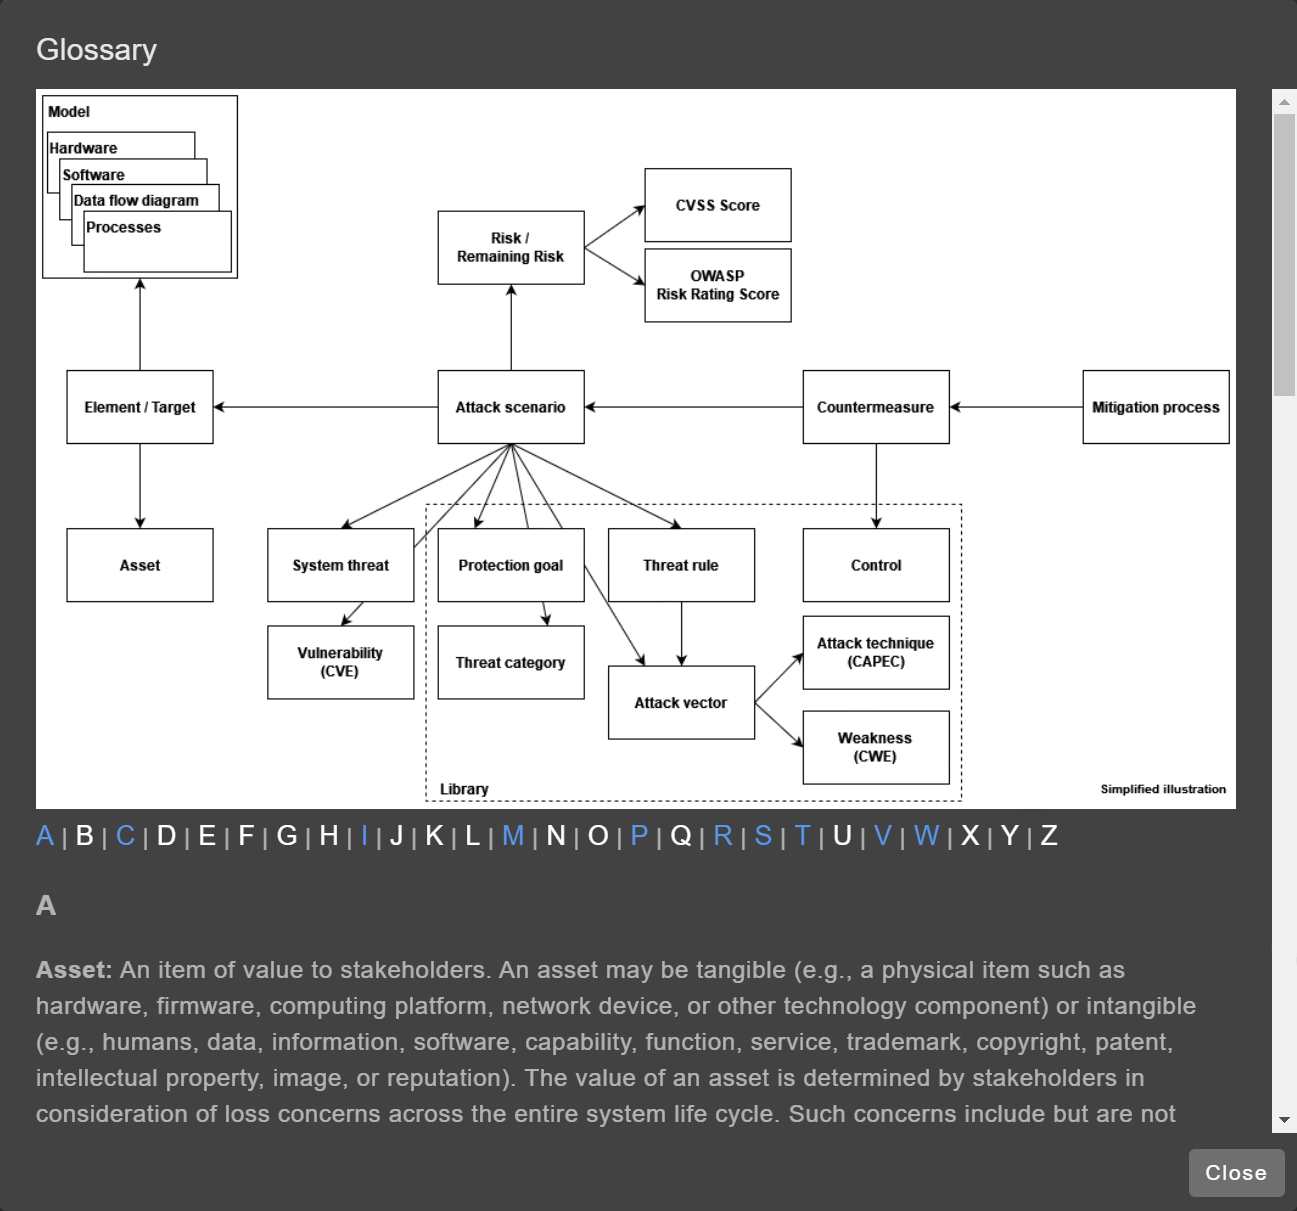
The tool has a built-in glossary explaining the used terms and their relation in the tool.
The glossary can be accessed in the tool via Help > Glossary.

Keyboard Shortcuts
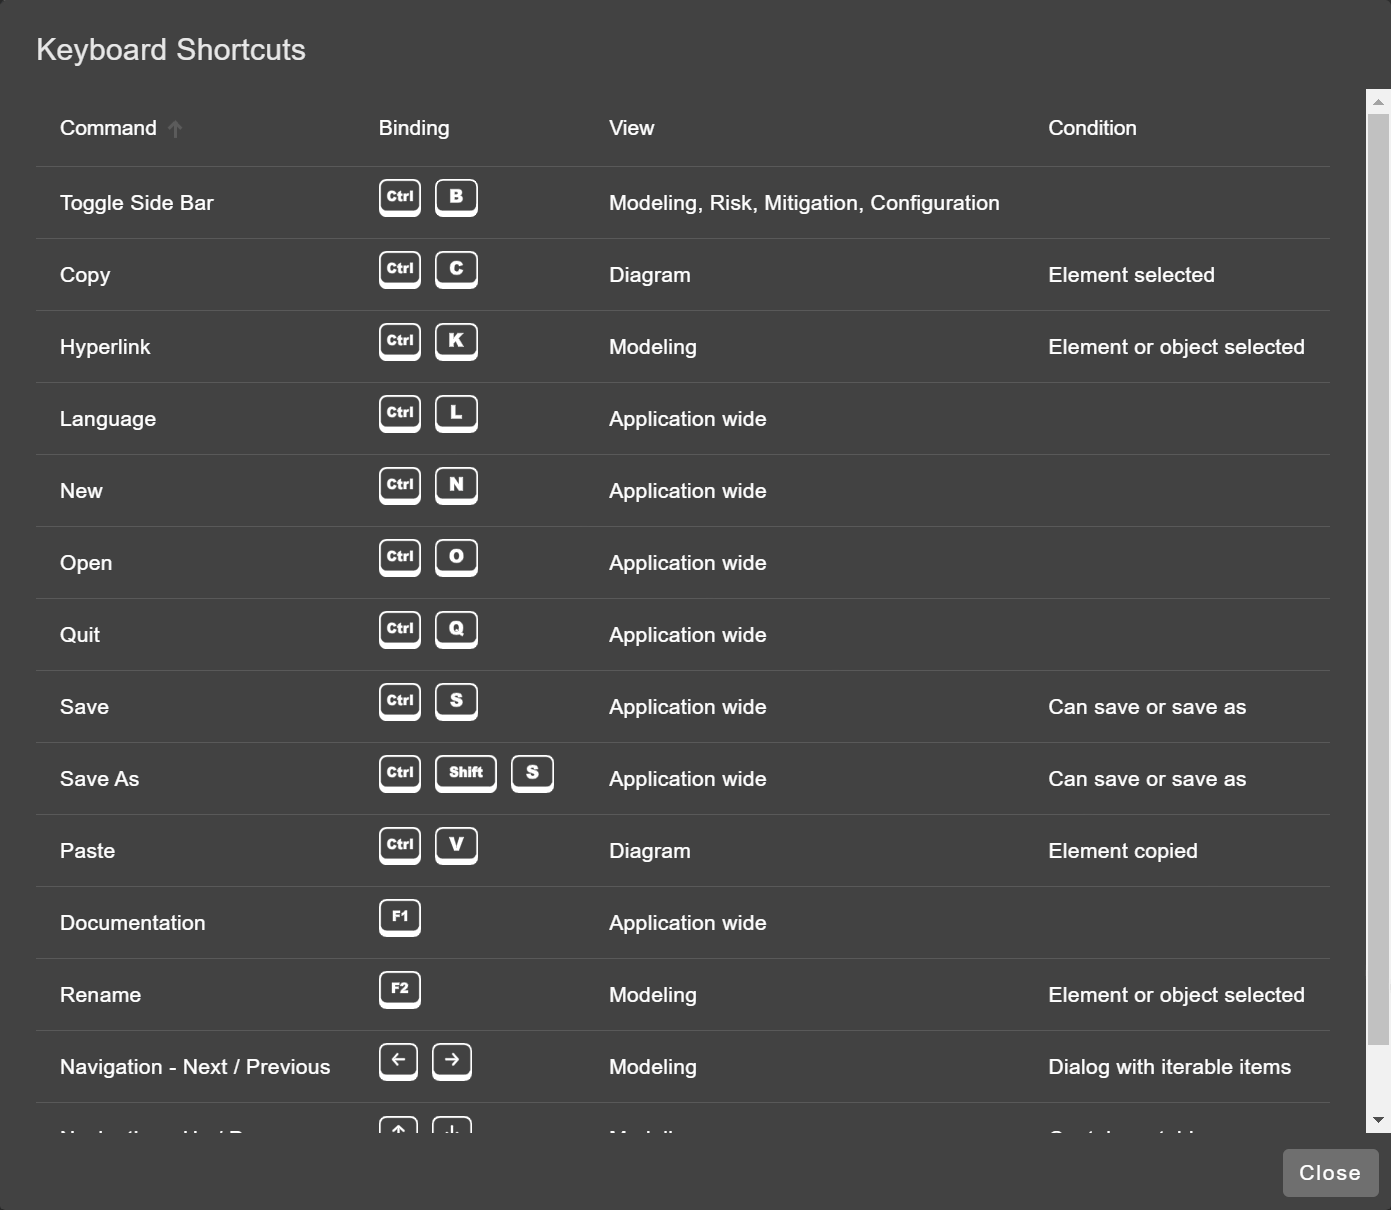
The tool supports multiple keyboard shortcuts. An overview of all shortcuts is provided in the tool via Help > Keyboard Shortcuts.
The View column describes in which page the command is available. If there are certain requirements/conditions that must be fulfilled, these are listed in the Condition column.
